 After setting up your Android development environment, it’s time you implement your first (simple) Android application. The steps to achieve this are:
- Creating a project.
- Create your user interface.
- Code the application.
- Run the application.
I will make an Android application which will provide a field where a user can type in a word and, after clicking on a button, will display that word.
[Update 15-03-2011] Updated to Android 2.3.3.
Creating a project
Before creating a project, you have to decide what the version of your Android Platform your application will be running on. You can view the current most used Android Platform on http://developer.android.com/resources/dashboard/platform-versions.html. In this example I will be using Android 2.3.3.
- From within Eclipse select File menu, New and Android Project.
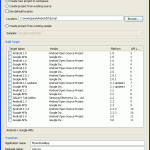
- Provide the information about the Android project and click Next.
- You can optional create a test project, which I will not do.
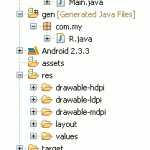
- Press Finish. You should see the following directory structure.
So what do I see?. The project name is MyAndroidAppProject. It is displayed under the Package Explorer on the left of the window.
- src: This contains the .java source files for your project. In this example, there are two files: Main.java and R.java. The Main.java file is the source file for your activity. The R.java file is a compiler-generated file that references all the resources found in your project. You should not modify this file.
- Android Library: Contains all the class libraries needed for an Android application.
- res: Contains all the resources used in your application. It contains three other sub-folders: drawable, layout, and values. You will see the use of the files contained in each sub folders shortly.
- AndroidManifest.xml: Is the manifest file for your Android application. You will specify the permissions needed by your application as well as other features needed by your application (such as intent-filters, receivers, etc).
Create your user interface
The Andoid SDK allows two ways of building the user interface: via a rich editor and XML files. The XML method is preferred as it allows you to declaratively define the UI of an application without needing to write lots of code. In addition, it allows a clean separation of logic and UI.
- Double-click on main.xml located under the res/layout folder.
- Add three UI elements (EditText, Button and TextView).
- Select the EditText element and change the property Layout Width to fill_parent.
- Select the Button element and also change the property Layout Width to fill_parent.
- Select the TextView element and also change the property Layout Width to fill_parent.
The main.xml should look as follows:
<LinearLayout xmlns:android="http://schemas.android.com/apk/res/android"
android:orientation="vertical"
android:layout_width="fill_parent"
android:layout_height="fill_parent"
>
<TextView
android:layout_width="fill_parent"
android:layout_height="wrap_content"
android:text="@string/hello"
/>
<EditText
android:id="@+id/EditText01"
android:layout_height="wrap_content"
android:layout_width="fill_parent"
android:inputType="text"
/>
<Button
android:text="@+id/Button01"
android:id="@+id/Button01"
android:layout_height="wrap_content"
android:layout_width="fill_parent"
/>
<TextView
android:id="@+id/TextView01"
android:layout_height="wrap_content"
android:layout_width="fill_parent"
/>
</LinearLayout>
Notice that in the element, the value of the android:text attribute is @string/hello. @string refers to the strings.xml.
- Double-click on strings.xml located under the res/values folder.
- Change the file as follows:
<resources>
<string name="hello">Welcome to My Android App</string>
<string name="app_name">MyAndroidApp</string>
<string name="btntxt">Click</string>
</resources>
Finally assign the btntxt string attribute to the button property of the main.xml. The main.xml should look as follows:
<LinearLayout xmlns:android="http://schemas.android.com/apk/res/android"
android:orientation="vertical"
android:layout_width="fill_parent"
android:layout_height="fill_parent"
>
<TextView
android:layout_width="fill_parent"
android:layout_height="wrap_content"
android:text="@string/hello"
/>
<EditText
android:id="@+id/EditText01"
android:layout_height="wrap_content"
android:layout_width="fill_parent"
android:inputType="text"
/>
<Button
android:text="@string/btntxt"
android:id="@+id/Button01"
android:layout_height="wrap_content"
android:layout_width="fill_parent"
/>
<TextView
android:id="@+id/TextView01"
android:layout_height="wrap_content"
android:layout_width="fill_parent"
/>
</LinearLayout>
Code the application
Change Main.java to the following:
import android.app.Activity;
import android.os.Bundle;
import android.text.Editable;
import android.view.View;
import android.widget.Button;
import android.widget.EditText;
import android.widget.TextView;
public class Main extends Activity {
EditText input;
TextView output;
Button buttonClick;
/ ** Called when the activity is first created. */
@Override
public void onCreate(Bundle savedInstanceState) {
super.onCreate(savedInstanceState);
setContentView(R.layout.main);
input = (EditText) findViewById(R.id.EditText01);
output = (TextView) findViewById(R.id.TextView01);
buttonClick = (Button) findViewById(R.id.Button01);
buttonClick.setOnClickListener(new View.OnClickListener() {
public void onClick(View v) {
display(input.getText());
}
});
}
protected void display(Editable text) {
output.setText(text);
}
}
Run the application
Al that is left is running the application.
- Right click MyAndroidAppProject.
- Select Android Application within the Run-As option.
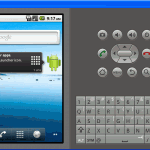
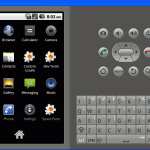
- Be patient, the emulator starts up very slow. You should get the following result:
Selecting MyAndroidApp.
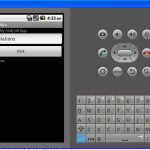
Enter some text and press on Click…
Appendix
Download source code Android.zip [16kB]

